

- Kheer is one of the most cherished desserts in Pakistani and Indian cuisine, loved for its rich, creamy texture and delicate aroma. Made with full-fat milk, fragrant basmati rice, sugar, and flavored with cardamom, saffron, and nuts, this timeless dessert is served during Eid, Ramadan, weddings, family gatherings, birthdays, and many other special occasions.
- The secret to a truly delicious kheer is patience. Slowly simmering the milk allows it to thicken naturally while the rice becomes soft and creamy. Every spoonful offers the comforting taste of homemade goodness, enhanced with crunchy almonds, pistachios, and the luxurious fragrance of saffron.
- Unlike quick recipes, this traditional method develops a naturally rich flavor without relying on condensed milk or artificial thickeners. Whether served warm during winter or chilled in summer, homemade kheer is always a crowd favorite. Follow the detailed steps below to prepare a restaurant-style kheer that is creamy, aromatic, and beautifully presented.
Recipe Information
| Details | Information |
|---|---|
| Cuisine | Pakistani / Indian |
| Course | Dessert |
| Preparation Time | 15 Minutes |
| Cooking Time | 50 Minutes |
| Total Time | 1 Hour 5 Minutes |
| Difficulty | Easy |
| Servings | 6–8 |
| Calories | Approximately 340 kcal per serving |
Ingredients
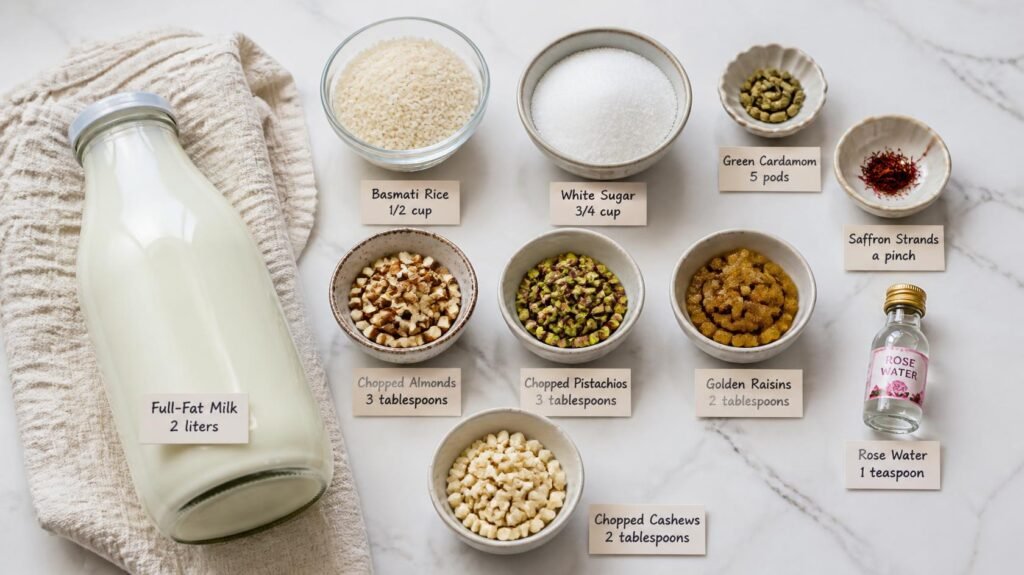
| Ingredient | Quantity |
|---|---|
| Full-Fat Milk | 2 Liters |
| Basmati Rice | ½ Cup |
| Sugar | ¾ Cup (or to taste) |
| Green Cardamom Pods | 5 |
| Saffron Strands | A Few |
| Chopped Almonds | 3 tbsp |
| Chopped Pistachios | 3 tbsp |
| Raisins | 2 tbsp |
| Rose Water | 1 tsp |
| Chopped Cashews (Optional) | 2 tbsp |
Equipment Needed
- Heavy-bottom cooking pot
- Wooden spoon
- Measuring cups
- Small bowls
- Knife & chopping board
- Serving bowls
Step 1 – Wash and Soak the Rice

- Wash the basmati rice thoroughly under running water until the water becomes almost clear. This removes excess starch, preventing the kheer from becoming overly thick or sticky. Once cleaned, place the rice in a bowl and cover it with fresh water. Allow it to soak for 20–30 minutes.
- Soaking softens the rice grains, helping them cook faster and absorb more milk during simmering. As the rice slowly cooks, it releases its natural starch into the milk, creating the signature creamy consistency that traditional kheer is known for. While the rice is soaking, prepare the remaining ingredients by chopping the nuts and measuring the sugar and spices. Drain the rice completely before adding it to the milk to avoid excess water diluting the dessert.
Step 2 – Boil the Milk

- Pour the full-fat milk into a heavy-bottomed pot and place it over medium heat. Stir gently every few minutes using a wooden spoon to prevent the milk from sticking to the bottom or forming a thick layer on the surface.
- Once the milk comes to a gentle boil, reduce the heat to low. Slow cooking is the secret to rich and flavorful kheer because the milk gradually thickens while developing a naturally sweet taste. Avoid using high heat, as it can cause the milk to burn or boil over. Continue stirring regularly, scraping the creamy layer from the sides of the pot back into the milk to make the kheer even richer.
Step 3 – Add the Rice and Slow Cook
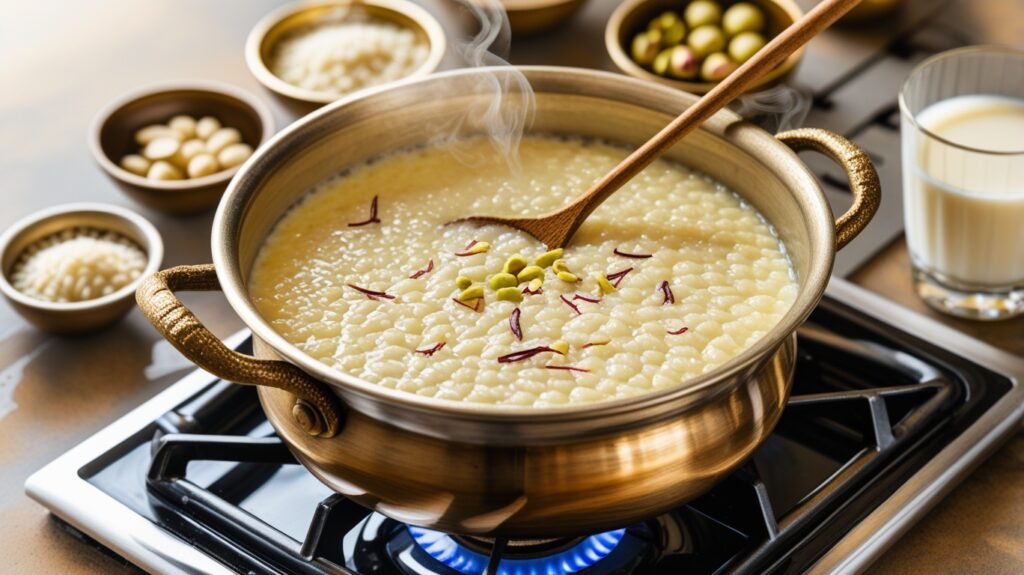
- Add the drained soaked rice to the gently simmering milk and stir well so the grains are evenly distributed. Keep the heat low and cook for 30–35 minutes, stirring every few minutes to prevent the rice from settling at the bottom of the pot.
- During this slow cooking process, the rice gradually softens and releases its starch into the milk, naturally thickening the dessert without any artificial thickener. As the mixture cooks, you’ll notice the milk becoming creamier and the rice turning tender. This slow simmering stage is one of the most important parts of the recipe because it creates the smooth, luxurious texture that makes homemade kheer so delicious.
Step 4 – Add Sugar and Flavorings

- Once the rice is fully cooked and the milk has thickened noticeably, add the sugar and stir continuously until it dissolves completely. Then lightly crush the green cardamom pods and add them along with the saffron strands.
- Allow the kheer to simmer for another 8–10 minutes so the flavors blend beautifully. During this stage, the aroma of cardamom and saffron fills the kitchen while the sugar enhances the natural sweetness of the milk. Stir gently and frequently to maintain a smooth consistency. You can also adjust the sweetness according to your preference before moving on to the final cooking stage.
Step 5 – Add the Nuts and Dry Fruits

- Once the sugar has completely dissolved and the kheer has developed a rich aroma from the cardamom and saffron, it’s time to add the dry fruits. Stir in the chopped almonds, pistachios, raisins, and optional cashews. Reserve a small portion of the nuts for garnishing before serving.
- Mix the dry fruits gently so they are evenly distributed throughout the kheer. As they cook for the next few minutes, they soften slightly while still maintaining a pleasant crunch. The raisins absorb the creamy milk and become naturally sweet and juicy, while the almonds and pistachios add texture and richness. If you prefer an even more luxurious flavor, add one teaspoon of rose water during this stage. Continue cooking over low heat while stirring occasionally to prevent the milk from sticking to the bottom of the pot.
Step 6 – Simmer Until Thick and Creamy

- Allow the kheer to simmer gently for another 10–15 minutes over low heat. Stir every 2–3 minutes, making sure to scrape the creamy milk solids from the sides of the pot back into the mixture. These milk solids add extra richness and create the authentic homemade taste that makes traditional kheer so special.
- As the dessert continues to cook, you’ll notice it becoming noticeably thicker and creamier. The rice should be completely soft, and the milk should coat the back of a spoon without being overly thick. Remember that kheer naturally thickens further as it cools, so remove it from the heat while it still has a slightly flowing consistency. This ensures the perfect texture once it reaches room temperature or is chilled in the refrigerator.
Step 7 – Garnish the Kheer

- Turn off the heat and allow the kheer to cool for about 10–15 minutes. Transfer it into serving bowls or a large decorative serving dish. Sprinkle the reserved chopped almonds, pistachios, and a few saffron strands over the top to create a beautiful presentation.
- For festive occasions, you can also decorate the kheer with edible dried rose petals or a thin layer of silver leaf (varak), if available. These simple garnishes make the dessert look elegant and restaurant-style without requiring extra effort. Whether served warm or chilled, a beautifully garnished bowl of kheer instantly becomes the highlight of any dining table and is perfect for celebrations such as Eid, Ramadan, weddings, birthdays, or family dinners.
Step 8 – Serve the Kheer

- Kheer can be enjoyed either warm or chilled, depending on your preference. For a refreshing dessert, refrigerate it for 2–3 hours before serving. Chilling allows the flavors to blend together and gives the kheer an even creamier texture.
- Before serving, garnish each bowl with a few extra chopped pistachios, almonds, saffron strands, and a light drizzle of rose water if desired. Pair it with other traditional desserts like Gulab Jamun, Jalebi, or fresh fruit for a complete festive dessert platter. This rich and creamy rice pudding is the perfect ending to any meal and is guaranteed to impress your family and guests with its authentic homemade flavor and beautiful presentation.
👨🍳 Chef Tips
| Tip | Benefit |
|---|---|
| Use full-fat milk | Creates the richest and creamiest texture |
| Soak the rice before cooking | Helps the rice cook faster and become softer |
| Stir frequently | Prevents the milk from sticking or burning |
| Cook on low heat | Develops a naturally rich flavor |
| Add sugar after the rice softens | Prevents the rice from staying firm |
| Reserve some nuts for garnish | Gives the dessert a premium presentation |
| Chill before serving | Makes the kheer thicker and creamier |
| Add rose water at the end | Preserves its delicate floral aroma |
⚠️ Common Mistakes
| Mistake | Solution |
|---|---|
| Cooking over high heat | Always simmer gently over low heat |
| Not stirring regularly | Stir every few minutes to avoid burning |
| Adding sugar too early | Wait until the rice is fully cooked |
| Using low-fat milk | Use full-fat milk for a richer result |
| Overcooking until too thick | Remove from heat while slightly loose because it thickens as it cools |
| Skipping the soaking step | Soaked rice gives a smoother texture |
| Adding too many nuts | Keep the balance so the creamy texture remains |
| Serving immediately after cooking | Let it rest or chill for the best flavor |
Delicious Variations
- Badam Kheer – Add extra almonds for a rich, nutty flavor.
- Pistachio Kheer – Blend pistachios into the milk for a naturally green, creamy dessert.
- Seviyan Kheer – Replace rice with roasted vermicelli.
- Coconut Kheer – Add coconut milk and desiccated coconut.
- Mango Kheer – Stir in fresh mango puree after the kheer has cooled.
- Chocolate Kheer – Add melted dark chocolate for a modern twist.
Serving Suggestions
- Kheer tastes delicious with:
- Gulab Jamun
- Jalebi
- Ras Malai
- Fresh Fruit
- Hot Tea
- Coffee
- Dry Fruit Mix
- Festive Dessert Platters
❄️ Storage & Reheating
| Method | Time |
|---|---|
| Refrigerator | Up to 4 Days |
| Freezer | Up to 1 Month |
- If refrigerated, the kheer will become thicker. Before serving, stir in a small amount of chilled or warm milk until it reaches your desired consistency. If serving warm, heat gently over low heat and stir continuously.
🥗 Nutrition Facts (Per Serving)
| Nutrient | Amount |
|---|---|
| Calories | 340 kcal |
| Protein | 9 g |
| Carbohydrates | 47 g |
| Fat | 13 g |
| Fiber | 2 g |
| Calcium | High |
| Sugar | 28 g |
❓ Frequently Asked Questions
1. Which rice is best for making kheer?
Long-grain basmati rice is the best choice because of its aroma and soft texture.
2. Can I use condensed milk?
Yes. You can replace part of the sugar with condensed milk for a richer flavor.
3. Why did my kheer become too thick?
Kheer naturally thickens as it cools. Simply stir in a little warm milk before serving.
4. Can I prepare kheer one day in advance?
Yes. In fact, many people find it tastes even better the next day.
5. Can I make kheer without saffron?
Absolutely. Saffron adds aroma and color but is optional.
6. How can I make the kheer creamier?
Use full-fat milk and cook it slowly over low heat while stirring frequently.
7. Can I freeze homemade kheer?
Yes, for up to one month. Thaw it overnight in the refrigerator and stir well before serving.
8. Is kheer served hot or cold?
It can be served either way, but chilled kheer is especially popular during the summer months.
Leave a Reply